Sep
10
Written by:
Michael Washington
9/10/2011 6:29 AM


When you write code in the LightSwitch client layer, you have programmatic access to most of the application. This also applies when you use Silverlight Custom Controls. This is important because it saves you from writing a lot of code. A professional developer can be far more productive when creating a LightSwitch application than when they are coding a Silverlight application without using LightSwitch.
You have the option of Running a LightSwitch Application With A Blank Shell. When you do that, you still have access to all the features described in this article.
In this article, we will take a random walk though the LightSwitch API (Application Programming Interface) to give you an idea of the programmatic access available to you from a LightSwitch Silverlight Custom Control (this also applies to LightSwitch Control Extensions).

This page describes the LightSwitch Data Model: http://msdn.microsoft.com/en-us/library/gg445195.aspx. There are a lot of classes covered, and the diagram is a very broad overview. However, it does describe the relationship between the major parts.
Note: You must have Visual Studio Professional (or higher) to create Silverlight Control using the method described in this article.
The LightSwitch Explorer Application
We will take our random walk through the LightSwitch API by creating a sample LightSwitch application. We will create a Silverlight Custom Control called “LightSwitch Explorer” that will display information about the collections of the screen that it is displayed on, raise methods, and switch screens.

We create a simple LightSwitch application that allows Products and Orders to be managed.

One screen for Products.

One screen for Orders.
The Silverlight Control

Add a new project to the Solution.

We add a Silverlight Class Library,

We select Silverlight 4.

The Project will show in the Solution Explorer, we right-click on the Class1.cs file and Delete it.

We add a New Item to the SilverlightControlLibrary project.

We add a Silverlight User Control, and call it LightSwitchExplorer.xaml.

We Right-click on References, and select Add Reference.

We add references to:
- Microsoft.LightSwitch
- Microsoft.LightSwitch.Base.Client
- Microsoft.LightSwitch.Client
This will allow access the LightSwitch API in the code behind file in the LightSwitchExplorer.xaml control.

We open the LightSwitchExplorer.xaml.cs file, and add the following using statements:
- using Microsoft.LightSwitch;
- using Microsoft.LightSwitch.Client;
- using Microsoft.LightSwitch.Details;
- using Microsoft.LightSwitch.Details.Client;
- using Microsoft.LightSwitch.Model;
- using Microsoft.LightSwitch.Presentation;
- using System.Windows.Data;
- using System.Collections;

We open the LightSwitchExplorer.xaml file, and change the markup to the following:
<UserControl x:Class="SilverlightControlLibrary.LightSwitchExplorer"
    xmlns="http://schemas.microsoft.com/winfx/2006/xaml/presentation"
    xmlns:x="http://schemas.microsoft.com/winfx/2006/xaml"
    xmlns:d="http://schemas.microsoft.com/expression/blend/2008"
    xmlns:mc="http://schemas.openxmlformats.org/markup-compatibility/2006"
    mc:Ignorable="d"
    d:DesignHeight="300" d:DesignWidth="400">
    <Grid x:Name="LayoutRoot" Background="White">
        <Grid.ColumnDefinitions>
            <ColumnDefinition Width="122*" />
            <ColumnDefinition Width="122*" />
            <ColumnDefinition Width="122*" />
        </Grid.ColumnDefinitions>
        <Grid.RowDefinitions>
            <RowDefinition Height="20*" />
            <RowDefinition Height="100*" />
            <RowDefinition Height="177*" />
        </Grid.RowDefinitions>
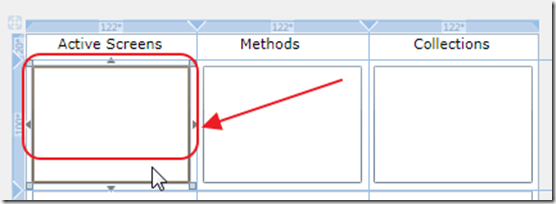
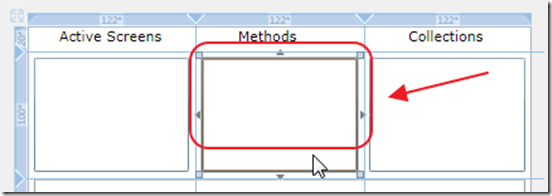
        <ListBox HorizontalAlignment="Stretch" VerticalAlignment="Stretch" Margin="5,5,5,5"
                 Name="lstMethods" Grid.Row="1" Grid.Column="1"  />
        <ListBox HorizontalAlignment="Stretch" VerticalAlignment="Stretch" Margin="5,5,5,5"
                 Name="lstActiveScreens" Grid.Row="1"  />
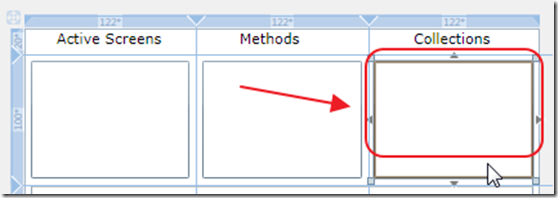
        <ListBox HorizontalAlignment="Stretch" VerticalAlignment="Stretch" Margin="4,5,5,5"
                 Name="lstApplicationDetailsProperties" Grid.Column="2" Grid.Row="1"  />
   </Grid>
</UserControl>
This just adds a grid and three ListBoxes.

We drag and drop a DataGrid on the page.
This will automatically add the needed assemblies to support the DataGrid.

We click and drag the corners of the grid to size it so it fill the entire bottom half of the page.

In the Properties for the DataGrid, we check the box next to AutoGenerateColumns.

We drag and drop a Label above the first box and change its Content to “Active Screens”.

We add two more Labels and name them “Methods” and “Collections”.
Add Code To The Silverlight Control

Open the LightSwitchExplorer.xaml.cs file, and add the following code:
        // This property is created because it allows us to raise
        // "OnExplorerControlDataContextPropertyChanged"
        // When the DataContext is updated
        public static readonly DependencyProperty ExplorerControlDataContextProperty =
            DependencyProperty.Register("DummyProperty", typeof(IContentItem),
            typeof(LightSwitchExplorer),
            new PropertyMetadata(OnExplorerControlDataContextPropertyChanged));

Next, add this line after the InitializeComponent(); line:
this.SetBinding(ExplorerControlDataContextProperty, new Binding());
This sets the binding for the
ExplorerControlDataContextProperty.
Add the following methods:
        #region ShowMethodsOnScreen
        private static void ShowMethodsOnScreen(LightSwitchExplorer EC, IContentItem contentItem)
        {
            // Fill the lstMethods ListBox with a list of all Methods on the current Screen
            foreach (var item in contentItem.Screen.Details.Commands.All())
            {
                EC.lstMethods.Items.Add(item.Name);
            }
        }
        #endregion
        #region ShowActiveScreens
        private static void ShowActiveScreens(LightSwitchExplorer EC, IContentItem contentItem)
        {
            // Fill the lstActiveScreens ListBox with a list of all Active Screens
            foreach (var item in contentItem.Screen.Details.Application.ActiveScreens)
            {
                EC.lstActiveScreens.Items.Add(item.Screen.Name);
            }
        }
        #endregion
        #region ShowScreenCollections
        private static void ShowScreenCollections(LightSwitchExplorer EC, IContentItem contentItem)
        {
            // Fill the lstApplicationDetailsProperties ListBox with a list of all
            // Collections on the current Screen
            foreach (var item in contentItem.Screen.Details.Properties.All())
            {
                EC.lstApplicationDetailsProperties.Items.Add(String.Format("{0}", item.Name));
            }
        }
        #endregion
Finally add the following method that will raise the previous methods when the DataContext is set or changed:
        private static void OnExplorerControlDataContextPropertyChanged(
            DependencyObject d, DependencyPropertyChangedEventArgs e)
        {
            LightSwitchExplorer EC = (LightSwitchExplorer)d;
            IContentItem contentItem = (IContentItem)EC.DataContext;
            ShowActiveScreens(EC, contentItem);
            ShowMethodsOnScreen(EC, contentItem);
            ShowScreenCollections(EC, contentItem);
        }
Insert The Silverlight Control Into The Application

Build the Solution.

Open the EditableProductsGrid screen, and add a New Custom Control.

Click the Add Reference Button.

Create a Project reference to the SilverlightControlLibrary project.

We will now be able to select the Custom Control we created.

In the Properties for the control, set the Label Position to None.

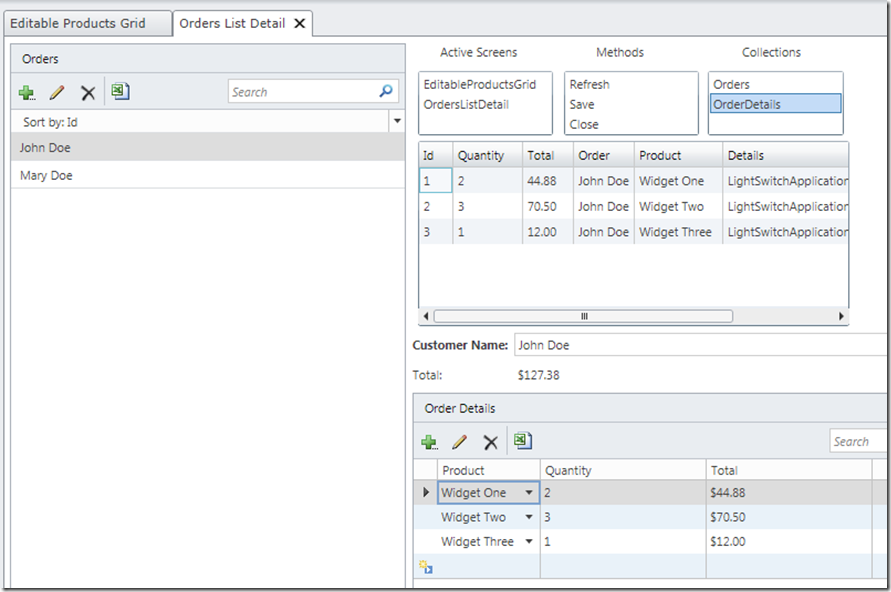
When we run the application, we see that the control displays the Active Screens, the Methods on the current Screen, and the Collections on the current Screen.
Make The Explorer Control Interactive

Return to the Silverlight Control, and double-click on the Active Screens ListBox.

The Method will be wired-up.
Use the following code for the Method:
        private void lstActiveScreens_SelectionChanged(object sender, SelectionChangedEventArgs e)
        {
            // Get the LightSwitch DataContext
            IContentItem contentItem = (IContentItem)this.DataContext;
            // The selected screen
            string strScreenName = (sender as ListBox).SelectedValue.ToString();
            // Get the selected Screen
            var SelectedScreen = (from ActiveScreens in
                                      contentItem.Screen.Details.Application.ActiveScreens.AsQueryable()
                                  where ActiveScreens.Screen.Name == strScreenName
                                  select ActiveScreens).FirstOrDefault();
            if (SelectedScreen != null)
            {
                // Activate the selected Screen
                SelectedScreen.Activate();
            }
        }

Double-click on the Methods ListBox.
Use the following code for the Method:
        private void lstMethods_SelectionChanged(object sender, SelectionChangedEventArgs e)
        {
            // Get the LightSwitch DataContext
            IContentItem contentItem = (IContentItem)this.DataContext;
            // The selected Method
            string strMethodName = (sender as ListBox).SelectedValue.ToString();
            var Method = (from Commands in contentItem.Screen.Details.Commands.All()
                          where Commands.Name == strMethodName
                          select Commands).FirstOrDefault();
            if (Method != null)
            {
                // Get a reference to the LightSwitch Screen
                var Screen =
                (Microsoft.LightSwitch.Client.IScreenObject)contentItem.Screen;
                Screen.Details.Dispatcher.BeginInvoke(() =>
                {
                    Method.Execute();
                });
            }
        }

Double-click on the Collections ListBox.
Use the following code for the Method:
        private void lstApplicationDetailsProperties_SelectionChanged(object sender, SelectionChangedEventArgs e)
        {
            // Get the LightSwitch DataContext
            IContentItem contentItem = (IContentItem)this.DataContext;
            // The Property Name
            string strPropertyName = (sender as ListBox).SelectedValue.ToString();
            var Property = (from Properties in contentItem.Screen.Details.Properties.All()
                            where Properties.Name == strPropertyName
                            select Properties).FirstOrDefault();
            dataGrid1.ItemsSource = (IEnumerable)Property.Value;
        }
The Explorer Control

Add the Explorer Control to the other pages of the application.
- You can click on the Active Screens to switch screens
- You can click on the Methods to execute them
- You can click on the Collections to see their contents (and edit them)
This Is Barely Scratching The Surface
This example barely touches upon all that is available to the LightSwitch developer. Information about the user, the complete database schema and data, and the entire application is available.
Operations that would normally take hundreds of lines of code to manually create in a Silverlight application, can be achieved with half a dozen when using LightSwitch.
Special Thanks
A special thanks to Sheel Shah because otherwise this article would not be possible.
Download Code
The LightSwitch project is available at http://lightswitchhelpwebsite.com/Downloads.aspx
Further Reading
Working with Data-Related Objects in Code
Performing Data-Related Tasks by Using Code
Running a LightSwitch Application With A Blank Shell
15 comment(s) so far...
Great Article Michael,
This one will help us exploring LS more in detail. Its a very nice research but I am still wondering what could be the possible use cases where we want to show an end user whats happening inside of their app.
Regards
Supreet
By Supreet on
9/11/2011 4:13 AM
|
@Supreet - When you're making Silverlight controls you sometimes need to know what else is on the screen. Especially when creating LightSwitch Control Extensions.
It is by inspecting the application's data model, that Lightswitch is able to automatically have drop downs in the DataGrid, and to open a record in edit mode when you click on it in a DatGrid or list box. Also, it uses this information to determine if you have permission to access a record or field.
You can easily have a button in a DataGrid that calls a method on the main screen. This is hard to do in normal MVVM because your "scope" is normally limited to only the DataGrid.
By Michael Washington on
9/11/2011 4:22 AM
|
Fantastic article Michael!
How did you find out all this? I'd love to get much deeper into Lightswitch, but am finding it hard to dig up all the details. Articles like this are a huge help, but make me wonder where you got the info!
Keep writing!
By Yossu on
9/12/2011 4:35 AM
|
@Yossu - I looked at sample code by the LightSwitch team.
By Michael Washington on
9/12/2011 4:36 AM
|
What a great article! A random question. What program do you use to annotate the screen shots? Your articles and ebook look so sharp and clearly show the user what to do on each screen.
Thanks,
Michael
By Michael Presley on
9/12/2011 8:57 AM
|
@Michael Presley - Thanks. http://Picpick.org is the program I use
By Michael Washington on
9/12/2011 8:58 AM
|
Very useful article
Thanks
By Misi Moisei on
9/22/2011 11:17 PM
|
Great Article Michael.
LightSwitch is truly Silverlight compatible !!! very nice
and I can do MVVM, right ?
Regards
By Oscar Agreda on
10/12/2011 4:52 PM
|
@Oscar Agreda - Yes, with LightSwitch you have to use MVVM.
By Michael Washington on
10/12/2011 6:35 PM
|
Michael
Very good article Michael.
From a SL custom control how would I access a local property definded using Add Data Item... ?
By Terry Hamaluk on
10/15/2011 3:24 PM
|
@Terry Hamaluk - Everything in my example was "definded using Add Data Item" :)
By Michael Washington on
10/15/2011 3:24 PM
|
Michael
Using "Add a data item", I select "Local Property", set the type to Int and give it a name. Now I want to be able to access that variable from the code behind of a SL control. Could you please show me how that's done ?
By Terry on
10/17/2011 12:37 PM
|
@Terry - I cover that here: http://lightswitchhelpwebsite.com/Blog/tabid/61/EntryId/24/This-Is-How-LightSwitch-Does-MVVM.aspx
By Michael Washington on
10/17/2011 12:38 PM
|
Hi Michael,
really a very helpful article. Thank you for sharing!
But one question I still have:
How would you force the data context to be changed from within a lightswitch screen (so that the changed event fires in the silverlight control)?
To set a boolean data item as Data Context (e.g. "Screen.myDummyBoolValue") in the custom control within the lightswitch screen and change the value doesn't trigger the change event. It only fires once when the whole screen is loaded/refreshed.
As I am showing the "active screens" list in a modal window (which can't be unloaded/reloaded) that's a bit of a proble to me ;-)
By Bernhard on
8/9/2012 7:54 AM
|
@Bernhard - Please see the Blog articles under Custom Controls and MVVM for examples.
By Michael Washington on
8/9/2012 7:56 AM
|